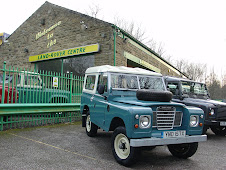
The problem with jumping into a project you know absolutely nothing about is that eventually you get caught out! In my case, it was the gearbox!.....theres nothing wrong with being caught out, its could be a good thing! after all, better find out now than somewhere down the line when your stuck! I could drive it but it would pop out of 3rd gear, and crunch in second, personally I would have kept with it, after all theres a knack to everything!...anyway the gearbox needs a new bearing and loads of other things so im told, so its out now and a new one in!
Theres the gearbox getting its first test! Its not as uncomfortable as it looks! A lot of people say that the beauty about land rovers is that you never know what'll happen next! I agree once I have the tools there! Im currently trying to convince this type of logic on a friend of mine, the " not knowing what you have until you find out yourself" theory, definitely more fun!.. but its harder done than said to convince this particular individual! I think im going to make em drive the landy and see if i can make some sort of point, would that be a sound theory? After all, how many of us here started to love our landies from their unpredictable spontaneous nature? The next time Im on, im going to show how it took me ridiculously long to make the engine water tight! it was one of them days! The leak just moved from one place to the next!
Thursday, January 3, 2013
Sunday, December 23, 2012
A long due update
Ok so I haven't had the time to put up all the pictures, but the jeep is finally finished. In the next two weeks Im going to completely update you on all the work that was done to get it there!
Saturday, October 23, 2010
Coming Soon
We havent had time to upload all the work weve done so far but Ive finally come around to getting it done so it should be up within a week or so. In the next post we go through how we got the chassis from looking like what you have seen, to looking like this . .
Thursday, June 3, 2010
The bulkhead Part 4 (patching up)
Well there wasnt much left to do except re-attach the left hand side bonnet hinge, re-inforce the right hand side hinge and patch up any holes remaining(which wasnt much).Heres a picture of the left hand side of the bulk head completed with the hinge re-attached!
and heres the right hand side done with the old hinge re-attached!
and ofcourse we re-inforced this hinge aswell by connecting the inner pannel to the outter pannel which is connected to the hinge.This way, it makes it stronger for taking the wheel on the bonnet
Tuesday, June 1, 2010
The bulkhead Part 3
Heres the left Footwell. Thankfully the left hand side of the bulkhead isnt as bad as the right, so it was really just small patch up jobs. Here we just did what we did with the other footwell, the rust was cut out, the measurements were taken, the steel was cut and we put the grooves in, and then patched it in with the migwelder, and this is how it looked in the end!
The bulkhead Part 2
Due to the way the old series Land rovers were made, alot of condensation used to build up behind the dash which created electrical problems in the short term and bulkhead rot in the long term. Heres how we refabricated the inside of the bulkhead behind the dash and also the footwell.
We started off by cutting all the rot out which due to its condition didnt take that long. Then measurements were taken and Francis used some 3 mil plate to do the job. After the shape was cut out, the two of us went over to the sheet bending machine and put it into shape. Thankfully theres a mig welder in the themetalbenders workshop so the plate was easily put to the bulkhead without anything being burnt through.
The result was this . . . it looks almost new doesnt it?
We decided we wanted to keep the footwell looking original so, after we had our measurements taken and our steel cut for our new piece of the footwell, we placed the sheet over an open gap the size of some round bar, on the vice.Then we hammered the round bar into the steel until the steel started to go through the gap in the vice. This gave us the groove in our new piece of the footwell which left it looking original!
The bulkhead Part 1
Look how bad it is!
Current state of bulkhead . . . there was just so much rust and rot that the best thing to do was to just cut it all out, this corner here is the worst of the bulkhead , but youll see from the other pictures, theeeres so much more!
As you can see, the ten years out in the field hasnt done the bulkhead any favours but on the bright side, the rust hasnt rotted through to the inside panels so its quite repairable!
Heres a picture of the handy work of old franky! He litterally just looked at the hole, took a few measurements and disappeared! within five minutes he came back and this is what he had, its not even welded in or anything, that plate is just sitting there!
Theres the genius at work!
and theres the ouput! We decided that when the jeep is done that the tyre will always be on the bonnet, however even then , because of the the thin steel on the bulkhead where the hinges are placed, every time that youd need to open the hood, youd have to take the wheel off to avoid creating damage. However we have devised a simple solution, we linked the inner pannel with the outer pannel with solid steel inbetween before we put the hinge back on, making the bulkhead as sturdy as ever!
Subscribe to:
Posts (Atom)